Guest Post: Running Basics From The Mid-Distance, Mid-Aged Runner
Today"s post comes to from, in his words, "The Mid-Distance, Mid-Aged Runner." Thomas lives with his wife near Charlotte, NC. He began competively running in 8th grade and competed year-round all through high school. He"s been an active competitive long-distance runner since graduating high school in 1993. Currently, he runs 12-15 races per year (5-10K distance) and has a plethora of experience to share. Thanks Thomas!
Happy New Year Runners!
I hope everybody out there had a great Christmas and Happy New Year. I’m sure there are many people who made a New Year’s goal to get in better shape, and this potentially includes running. Unfortunately the weather this time of year and the eating habits of folks around the holidays can delay lacing up well-worn running shoes, much less band new ones.
The good news is, despite the weather and Christmas-cookie dinners, your running plans and hopes do not need to remain just that! In the majority of this first post in the series, I’d like to speak to the new runner; avid runners usually don’t need further convincing to run they just run! So to all my new runners (sometimes affectionately referred to as “Resolution Runners”) you had the tenacity to say you were going to try running, now let’s follow up on that declaration. I realize that this is easier said than done so here are my tips to get started.
First off you need to ensure you are ready to run. I’m not referring to the very popular three to four minute general stretching session that begins with both hands up in the air together in diving position, followed by a quick attempt to touch your toes (usually only reaching slightly below the knees), then progressing to the pull-foot to the buttocks standing quad stretch, and finally ending with the alternating arms crossed in the front of the body shoulder stretch. I can’t tell you how many times I see folks try to use this as a means to get warm and avoid injury.
If I may, allow me to be blunt: that modality of stretching is worthless, and can in fact lead to injury. Here is a great In Tennessee, traffic driving test game can be taken in person at a commercial driving school, or it can be completed online via a DOS-approved provider. stretching video for runners I recommend form YouTube: https://www.youtube.com/watch?v=nlitqDM40BE. A key point to remember is that you need to stretch after running as well. The post-run stretch is very important as this will increase blood flow. Many of the same stretches from the video can be used post-run as well.
Another piece of the puzzle is nutrition. This may sound familiar, but you perform to the level of fuel you put into your body. Good food choices include lean protein sources and plenty of fresh fruits and vegetables. Avoid regularly ingesting sugary, fatty foods, and other poor nutrient sources like alcohol. It can be beneficial to limit your caffeine intake to increase your sensitivity to it. This will increase it"s effectiveness during a race or long training run. Next, and I can’t stress the importance of this enough, drink plenty of water throughout the day. Your intake will vary slightly based off of mileage ran and temperature, but maintaining a consistent intake all year round I found helps my performance. For example I usually consume around a gallon of water (128 ounces) in a given 12 hour period. This may seem like a lot of water, and for the first few days you might feel like you are floating, but you will quickly become used to consuming more water the more you run. You will really notice how much better and energetic you will feel during your runs.
The next major focus to start running is to set attainable goals. Nothing can sideline running progress like setting too high a running goal early on, and then ending up with an injury, such as shin-splints, within a week of starting your new running habit. An option to consider is incorporating walking breaks during your run to help you recover and build up your endurance, especially if you"re brand new to running. If you are opt to use a walk-run training method I recommend using a time method such as run 2 min/walk 2 min. If you fitness level is decent but you do not run regularly at this point, perhaps begin your running training with a goal of competing in a 5K by say, March. There can be so many variables for goal setting, and no one solution will work for everybody- you might need to try a couple of running plans before finding the correct one for you. For direct help I suggest visiting your local “serious” running store. I’m not knocking big-box sporting goods chain stores, but usually the employees are not specifically trained in running.
Now that we have discussed the basic running components of proper stretching, the need for hydration and proper nutrition, and setting realistic goals, let’s examine a few running shoe choices. Before I get started on this topic two things to keep in mind, first I know many people already have their own opinion on what the best running shoe is out there, and second I am not paid to advertise any of the following shoe brands.
Now with that being said, there are many variables that go into selecting a good running shoe. What one brand/model of shoe offers one individual many not be the same for everybody. I can attest to this by the fact that there are two popular running brands out there I will not wear as I have tried several models of their shoes without finding a good fit. I will not use their names so I don’t sway opinions. Currently my favorite brands are: Hoka One One, Brooks, Saucony, and Mizuno. For the last quarter of 2013 and all of 2014 I have been running in Hoka shoes. These shoes are designed for long distance running and max cushioning, but they have models that fit all running types and conditions. Don’t let the look fool you, these are great running shoes, and they hold up to running abuse well. Hoka’s are the only running shoe I have been able to push over 500 miles in and still feel good cushioning and responsiveness. I would encourage any runner at any level from beginner to advanced to give then a try.
Whew, that was a lot. There"s just so much to say on these topics, and I really just scratched the surface. In next month’s conversation I will address setbacks from injuries (always a fun topic in running!), and specific models of Hoka shoes for different running surfaces, distances, and race/fitness goals.
Until our next conversation take care and enjoy the run!
The Mid-Distance, Mid-Aged Runner
Teaching and Improving the Vertical Jump- Technique
Here at SAPT volleyball players abound. Volleyball players (and their coaches) often come to us with one goal: to increase their vertical jump height. Personally, I think there are several other skills that are just at important, i.e. upper body strength/power, ability to shuffle sideways- you'd be surprised how many girls I see who CANNOT do this- core strength and force transfer, and improving overall athleticism. But I digress.
While there are whole books devoted to increasing vertical jump, I'm only going to focus the basic technique that will, honestly, improve the jump considerably. I think it should be obvious that to increase height, one must also increase their strength (ahem, lift heavy things) but that's not today's focus. Next week, we'll look at specific strength training exercises.
Our typical age range for VB players is 13-18 and this is the typical jump technique we see:
Yes, this is RGIII, and yes I'm comparing his jump form to a 15-year old volleyball player's form.
Similar to the above picture, when we evaluate a volleyball player 99% of the time we see valgus collapse (knees coming together- helloooo ACL tear!), knee-flexion dominance, loosey-goosey core, and usually, minimal arm swing involvement.
All these work against the poor girl and her goal of leaping high aloft to spike the ball into her opponent's face. I'm going to briefly break down the mechanical flaws previously mentioned and then present a few drills we use to re-pattern the jump to create leaping, jumping, ball-spiking machines.
1. Valgus collapse- When one's knee caps touch, it results in a decrease in power since the quads, hamstrings, and glutes are at a mechanical disadvantage. Try it, you won't get up very high. What's worse, is it dramatically increases the risk of an ACL, or two, tear. As you read this, stand up, bend your knees, then put them into valgus collapse. Do you feel a little bit of torque on your knees? Now imagine launching into the air and landing again (which landing is roughly 2-4x bodyweight force) in that position. Yikes. Is it any wonder that many volleyball players have knee pain? The knees should be neutral, aligned directly over the 2nd or 3rd toe.
2. Knee/Quad Dominance- Most girls are quad dominant. It's not their fault, that's just how they grew up. At SAPT we aim to change that. As any long-time reader of our blog knows, it's all about dem glutes!
The posterior chain, that is, the glutes and hamstrings, are where it's at when it comes to lower body power production. The glutes and hamstrings are way, way, WAY better at extending the hip than the quads (mostly because, the quads can't do it at all). Quads are important in the vertical jump- as is knee extension- however, the power comes from the back. Athletes who don't tap into their posterior chain will remain on the lower end of the VerTec.
3. Loosey-Goosey Core- That is a technical coaching term by the way. A lot of our VB players don't know how to stay tight during the take-off. All the power they applied to the floor disseminates and leaks out at all the loose points so they wind up going nowhere. Imagine a cooked spaghetti noodle trying to jump and that's what it looks like.
4. Little to no arm swing- How people learn to jump without using their arms is a mystery to me. The arms help increase velocity at take off by storing potential energy in the arms and then releasing it upon take off. They also help "pull" the body upwards. Don't believe me? Some one did a research study and you can read the abstract here.
So, how do we fix all this?
First we teach hip hinging without knee valgus collapse. The easiest way we've found is employing a dowel rod.
Coaching points: 1. The athlete should maintain contact with the dowel rod at three points: head, mid-back, and tail bone. 2. Knees should be behind the toes. I will put my hand in front of their knees to ensure they sit back in the hips and not bend forward from the knee. We also coach neutral knee alignment here.
Next, we put the hip hinge in context of a take-off/landing, but no jump. By eliminating the jump, the athlete can focus on his/her form.
Coaching points: 1. Arm swing, arm swing, ARM SWING! I tell the athlete to pretend she's pushing through water. The arm swing should be forceful. 2. The hip hinge should be there, the knees should be neutral and behind the toes, just like the dowel rod hip hinge drill. I use the analogy of booty-bumping their friend. Girls get this, guys don't. I guess fellas don't booty bump. 3. This is a perfect time to teach tightness. The athlete's core should be taut and the spine should remain neutral. This is where the limp noodles happen, so be vigilant!
After the athlete masters the arm swing + hips, we move to a paused vertical jump. Again, the pause is there for the athlete to focus on the form before taking off. If they're not in the right position, they can fix it- or rather, you the coach can fix it.
Coaching points: 1. Stress to the athlete that it's NOT about the height of the jump, but the technique. I've seen girls with great technique fall to pieces as soon as the jump is part of the equation. 2. The landing should look like the take-off 3. Hammer all the above mentioned technique points.
Practice makes permanent, not perfect.
These three drills are SAPT's basic jump technique teachers. We've seen great results and many girls add inches to their vertical just by becoming more efficient at the jump itself. I'd also like to point out that none of these use fancy equipment. So often it's the simplest way that is the most effective!
Next week we'll take a look at both strength exercises to increase vertical and some more specific drills for power production.
An Often Over-looked Form of Soft Tissue Treatment
As many of you may know, within the next coming week, SAPT will be offering Soft Tissue Therapy! This is something that I've long been waiting to offer as a service as we can now put my NKT, massage and other modalities to use! Today's post is to help us kick this off as I talk about Spindle Cell Compression and how it can be used to help treat dysfunctional sensory information from trauma to help correct movement dysfunctions.
https://www.youtube.com/watch?v=I5745g6ybhI
If you're interested in signing up for a session with me, shoot me an email at jarrett@saptstrength.com and we will have more information posted on our site soon!
Crawling Your Way to Chiseled Abs
Since we're now 8 days into the New Year, I figure it's officially safe to bring up talk about New Year's Resolutions. As 2015 approaches it's 2 week anniversary, the local gyms are finally beginning to recover from the post-New Year membership boom. The gym regulars have finally returned, glad to be relieved of those performing bicep curls in the squat rack. Among them are the brave few who have actually stuck to their resolution. If you're one of these brave men and women, it's important that you give yourself a pat on the back for making it this far. By now, you've probably logged anywhere between 4 and 6 training sessions, begun incorporating movement into your daily routine more frequently, and, hopefully, you've been introduced, or made a triumphant return, to the weight room. It's important that you stick to your resolution. Remember, this goal is important to you, and you made it for a reason. Whether your resolution was to finally bench 350, simply lose that pudge thats been sticking around for entirely too long, or achieve the core strength of these gentlemen...
It's imperative that you have a game plan set up to help you tackle this challenge. If your resolution is fitness related, it's likely that you'll be expecting a trimmer belly from all the hard word you'll be putting in. Your game plan will probably include 100's of sit-ups, miles upon miles of jogging, and a new diet plan void of any form of carbohydrates. Now I can go on and on about why cutting carbs may not be the wisest choice (especially if you're also planning on ramping up your physical activity), but for now I want to tackle the misinformed notion that sit-ups are the way to go for developing core strength.
Most people with normal cognitive function would agree that sitting hunched over your computer is not the most ideal position for us to spend our time. They recognize assuming this posture just isn't healthy for our spine, and can contribute to neck pain and back pain that haunt the desk-jockey. Unfortunately, many of us don't even consider the fact that we're replicating and training this poor posture over and over again when we perform a sit-up. Not only that, but some people will take it a step further, and add load to the movement. Needless to say, I am not a fan.
"So what am I supposed to do to get that rock solid core?" - you may ask. Well, I'm here to provide another way... Crawling. Tiger Crawls, Leopard Crawls, Spider Crawls, Alligator Crawls. You may think you're "too advanced" to waste your time crawling, but even Green Bay Packer CB Sam Shields incorporates crawls into his workouts. Check out the video below to watch our very own Steve Reed demonstrate a wide variety of crawl variations.
Why crawl? Well, it's really very simple. Contrary to popular belief, our core is comprised of more then just our rectus abdominals (your 6-pack). You have your intrinsic core, which consists of your diaphragm, your transverse abdominals, your pelvic floor and your multifidi. You also have your extrinsic care, which consists of your rectus abdominals and your internal and external obliques. Some may argue (and I'm inclined to agree) that your glutes, hip flexors, and your spinal erectors also consist of your "core".
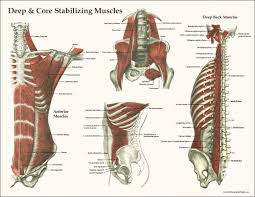
There are so many muscles tied to core stability that it's ludicrous to assume that the common sit-up will truly be able to train all of them at once. Really, we're only training trunk flexion when we're performing the sit up. This is the function of the rectus abdominis and the psoas, while both pairs of oblique muscles work as synergists. Crawling, on the other hand, hits just about every core muscle I've mentioned, a few others I have neglected, while also providing a huge amount of side benefits.
The challenging part of performing any crawl variation is maintaining a neutral spine, while keeping your hips still and your breathing steady. Unless you're crawling on the moon, gravity is going to be pulling you to the floor, and you're going to have to give it everything you've got to keep your core engaged and avoid sagging your lower back. This will present an enormous challenge. If Sam Shields uses crawl variations in his workout, you better believe you'll be feeling the burn after a 20 meter crawl.
On top of that, crawling is a great way to build shoulder, hip, and knee stability. It's a low-impact movement that will also cause your heart rate to shoot through the roof. This results in a joint-friendly exercise that also causes you to burn a load of calories and shed that unwanted belly fat. You can take it a step further by adding chains or dragging a sled to supercharge the benefits and really ramp up the stimulus.
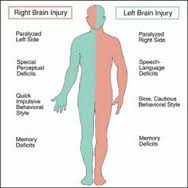
Last, but certainly not least, crawling is a great base-building exercise for field sport athletes and runners. I mentioned the low-impact nature and the effect on joint stability, but a proper crawl is also executed using contralateral (opposite) limb movement. This means you should be taking a step with your left leg while simultaneously reaching forward with your right arm. We initially develop the ability to perform contralateral movement during early childhood development. The left hemisphere of our brain controls the right side of our body, and vice verse. Executing a crawl with proper contralateral movement in turn stimulates both sides of our brain, and strengthens the pathways between the two hemispheres.
Now that you've seen the light, ditch those sit-ups and start incorporating crawling into your workout routine. Not only will your waistline thank you, but the effect on your overall strength and stability will blow your mind. My New Year's Resolution: Crawl more in 2015.
A New Super Smoothie
Today’s blog post seems like an excellent time to share a smoothie recipe I recently tried and enjoyed. I try to make a smoothie most days of the week, usually as a snack, and this typically involves tossing together bunch of ingredients in a blender that sound delicious. Rarely do I follow recipes regarding my smoothies, or cooking in general, because I consider myself an artist in the kitchen. On this occasion I surfed the web and found myself on the Blendtec website where I found a recipe calling for:
- 6oz Water
- ½ Cup Low Fat Cottage Cheese
- 1 Tbsp. Chia Seeds
- 1 Banana
- 1 ½ Cups Kale
- 1 Cup Pineapple
- ¾ Cup Mango
- 1 Cup Ice
- 1 Tbsp. Sweetener of Choice (Agave Nectar, Honey, etc.)
Besides the taste, the best part of this recipe is its simplicity. You merely add the ingredients to a blender in the order listed and blend until you reach your desired thickness. One thing to note is that the portions listed crank out two 14oz. servings. The ease of this recipe means that in about 5 minutes you can be out the door with a smoothie that delicious and nutritious.
http://youtu.be/lBUJcD6Ws6s
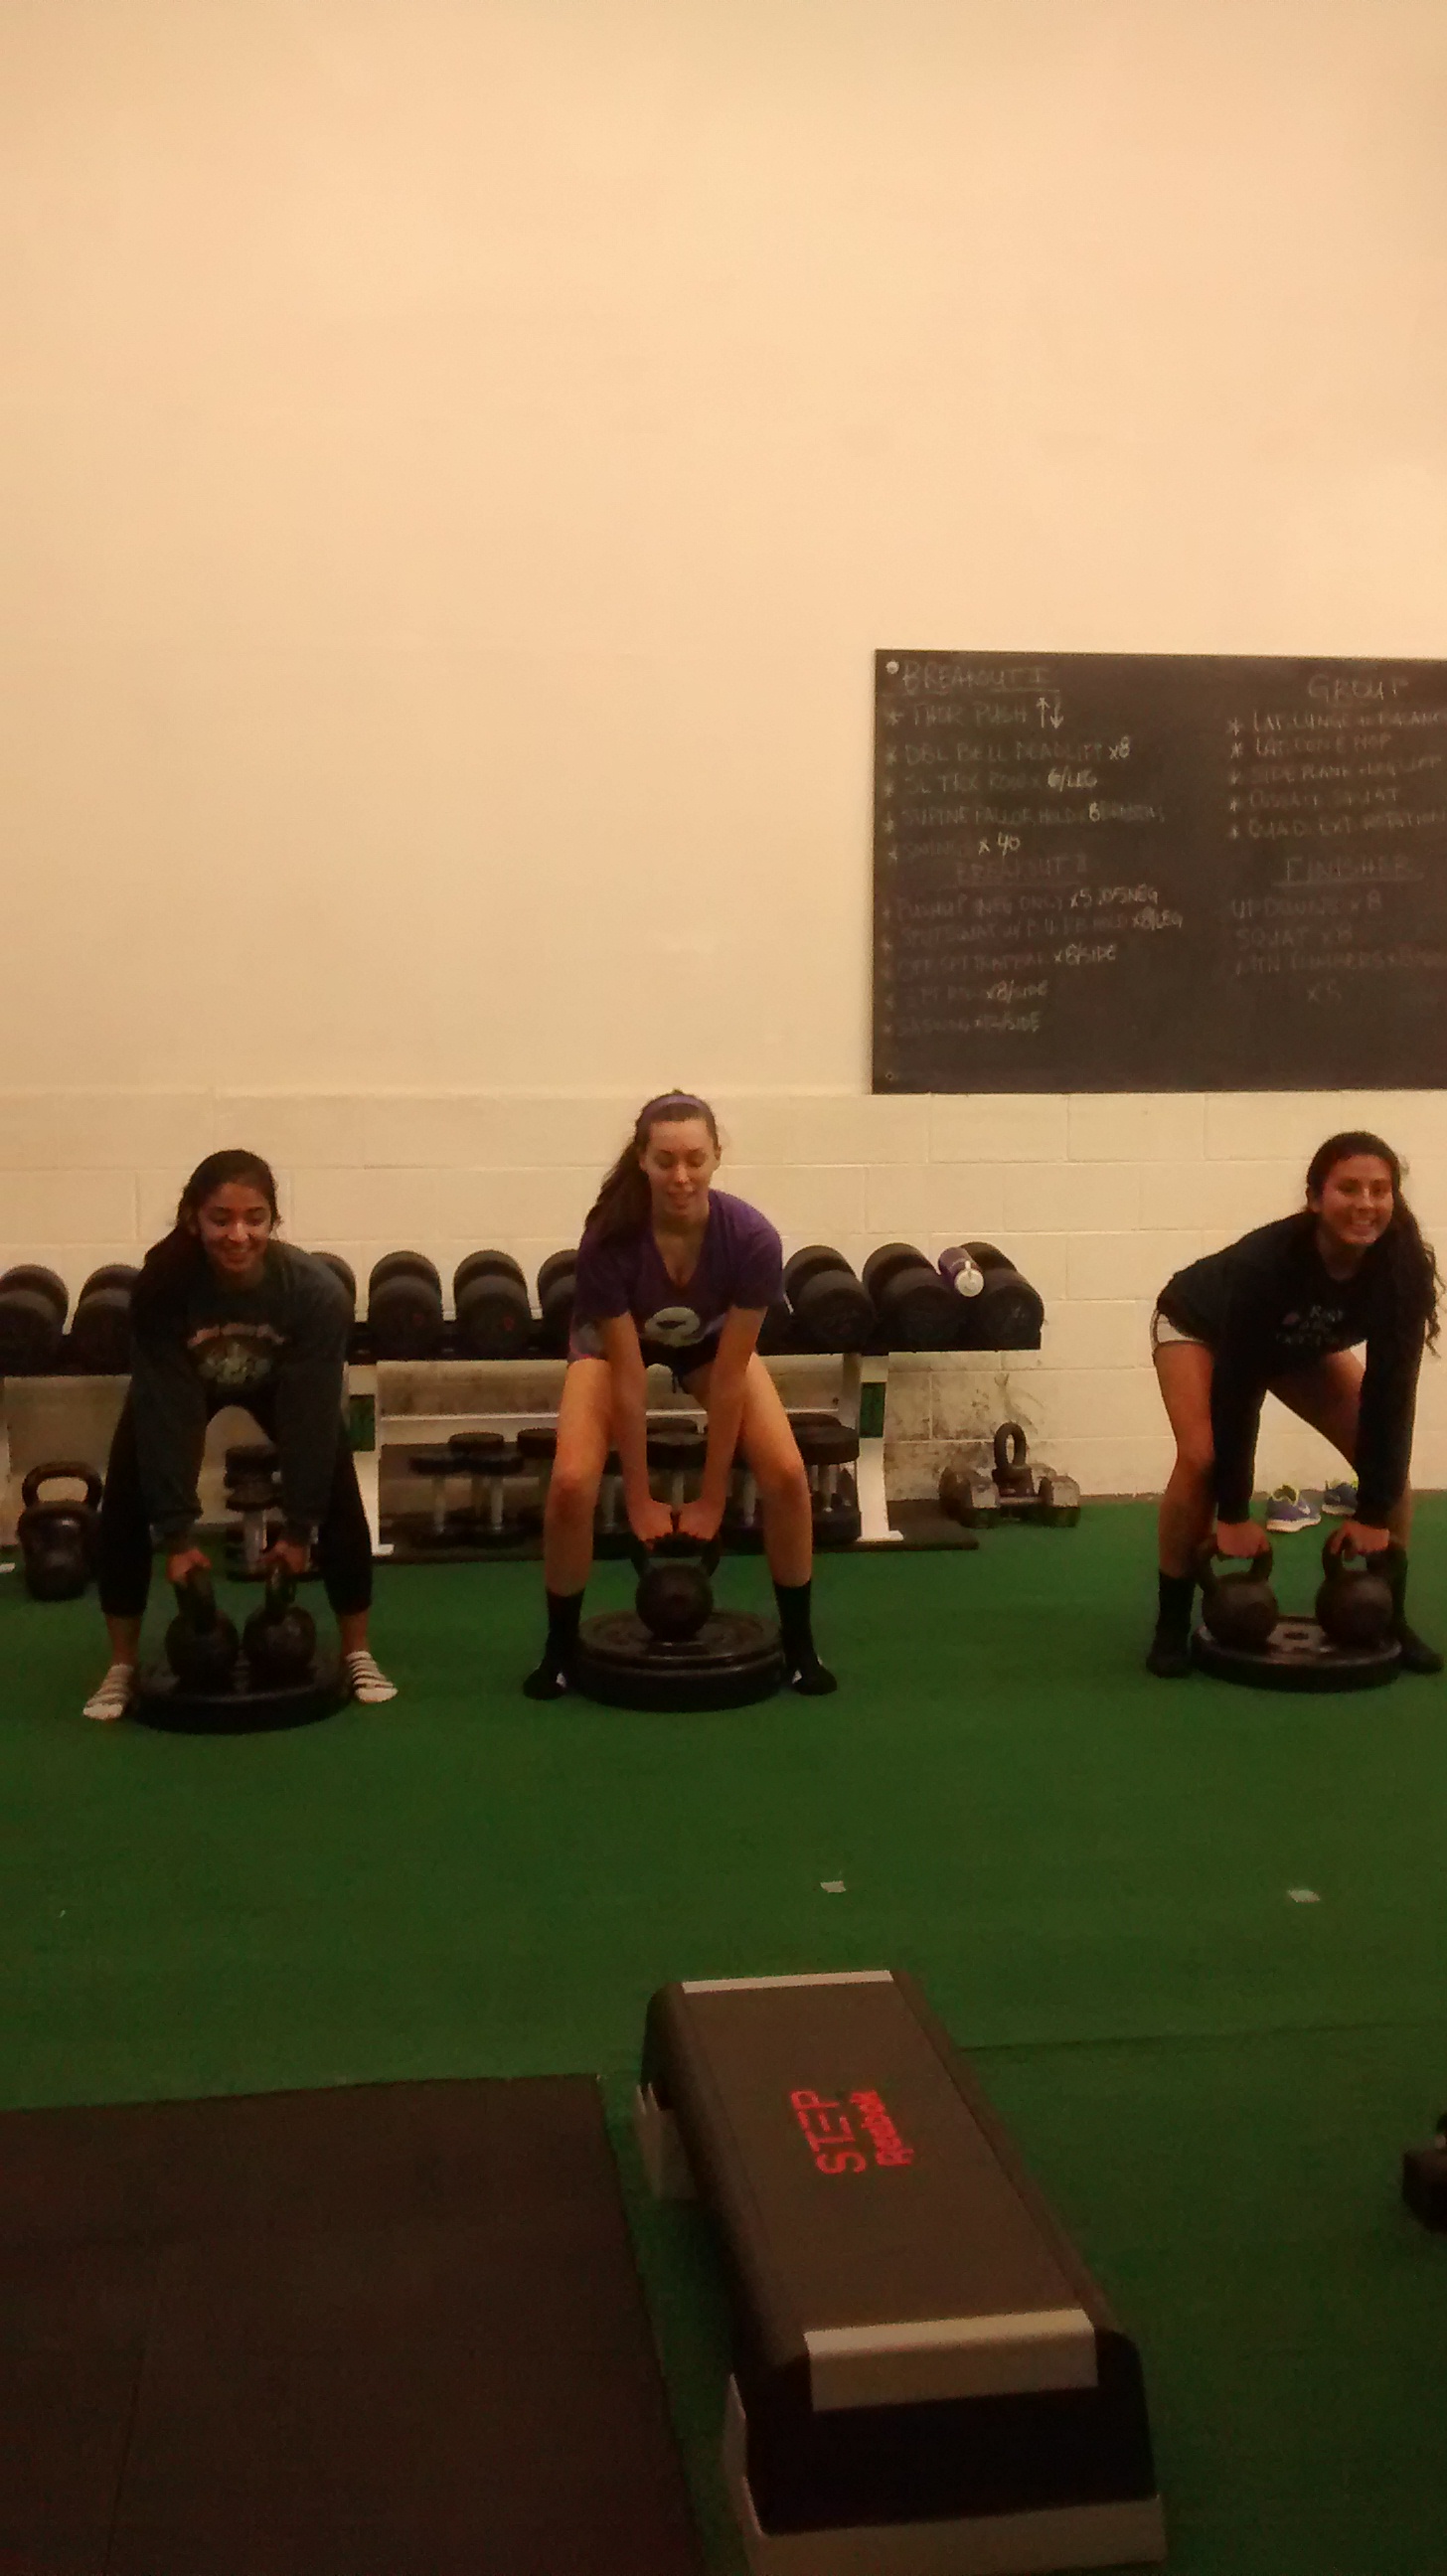
7 Reasons To Swing Big Bells
I apologize for the slightly weird camera angle, but I had no one to film it for me.
I mention BIG bells because I assume that the reader/trainee is already a master of swinging normal size bells. Perhaps that will be next week's post, breaking down swing mechanics... What qualifies as "big"? One could argue that is a subjective measurement, which it is, but my standard of a "big" bell is anything over a 28K (62lbs). I had a 32k in the video. Why one should swing kettlebells to begin with shares the same reasons as swinging big bells, but because they're bigger and require more strength and power to move, big bells obviously will have a higher degree of awesomeness.
BIG BELLS and WHY YOU SHOULD SWING THEM:
1. Glute Strength- This is probably the most obvious one. The glutes are (or rather should) be the prime movers in the swing. Considering that athletic power- think sprinting, hitting a baseball, jumping, leaping- is found in the glutes, it would behoove one to have strong glutes.
2. Glute Power- Akin to strength, power= force/time, or in non-physics terms, power is how quickly one can express one's strength in a given time frame. For example, a broad jump is a pretty solid measure of lower body power as the athlete must produce a lot of force to launch the body forward in a very short amount of time. The distance traveled is a combination of strength and how quickly that strength was expressed (see more on Rate of Force Development if you're still confused). Swings are a quick, ballistic movement and thus train glute power because they have to contract forcefully in a brief time frame to hike the bell forward.
It's a less technique-intensive way to build power than say, barbell power cleans or snatches.
3. Teaches/Strengthens Core Stability- The core, encompassing both the anterior and posterior musculature, must remain taut to efficiently transfer force from those awesome gluteals to the arms which are attached to the bell. Without a stiff core, power leaks abound and the swing ends up make everyone's eyes bleed within a 10 foot radius. I've seen it happen. This ability to maintain a stiff core translates nicely to all sports in which the lower body transfers force through the core to the upper body (i.e. pole vaulting, baseball throw or batting, volleyball spike).
4. Fixes Anterior Pelvic Tilt- I've written on APT before (notably here) and how it can negatively affect performance, power output due to misalignment, and have an impact on hip and lower back health. Swings require a powerful posterior hip snap (see video above) at the top of the swing. That snap- via the glutes and anterior core contracting concurrently- pulls the pelvis into a more neutral position if one is in APT. As the glutes and anterior core muscles grow stronger, it becomes more natural for the pelvis to sit in a neutral position instead of tilted forward. I can attest that my APT, and subsequent back pain, has vanished since swinging big bells regularly. Huzzah for neutral alignment!

5. Grip Strength- Holding anything heavy over a given period of time will build grip strength, but holding onto a heavy thing that's flying through the air rapidly adds a challenge to the forearms and hands. Thus, if you're weakest link is your grip, swinging heavy bells is for you!
6. Builds Upper Back Strength- Much like the core, the upper back must remain stiff throughout the swing. The upper back muscles are essentially performing an isometric hold during the swing, and the heavier the bell, the harder they have to contract. The lats in particular must remain tight and strengthing those bad boys carries over to deadlifts and pull ups (both of which are money-makers in the strength game).
7. It's Good For You- If no other reason convinced you, which I can't imagine why not, you should swing big bells because it's good for you. I'm a Jedi, therefore you should trust what I say.


