core

Some Female Pushup Goodness

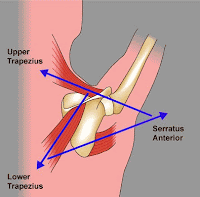
A misconception I would like to blow out of the water today is that women should only perform pushups from their knees.  It seems that when some fitness instructors are working with females, and realize they can't do "normal" pushups from the feet, they resort to placing their knees on the ground. Not that there is never a time or a place for this, but I feel it's a misguided mindset, for two reasons:

  1. I've never seen a correlation between the number of pushups a woman can do from her knees versus the ability to perform a pushup from her feet (ex. even if a woman can do 25 pushups from the knees, she still may not be able to do a full pushup with the knees off the ground).  This is largely do to the heightened lumbo-pelvic stability suddenly required at the hips/torso when the knees are elevated.
  2. While subtle, it continues to perpetuate the notion that women should train differently than men and are destined to be "inferior," if you will, in the weight room.  I think we should set women up for success, and show them what they actually cando with some perseverance and proper coaching.

If we're trying to, oh I don't know, actually improve female's movement quality and help them become stronger (not to mention boost their confidence), we need to stop perpetuating this notion that the majority of women are doomed to eternally fail at the full-range pushup.

Granted, nature hasn't necessarily set women up to learn the pushup as quickly as most men, due to biomechanical factors. For example, females tend to have a higher "lower body mass:upper body mass" ratio compared to men (think of having a weight placed over your hips versus your shoulders in a pushup, this would make it much more difficult).

However, with some careful coaching and persistent practice, almost any female can obtain this. We coach girls who can perform better pushups than most men I see in commercial gyms, and these same girls couldn't do a single perfect pushup when they first started training at SAPT.  My guess is that if we had just resorted to having them do "knee pushups," they'd still be unable to do a proper pushup (not to mention received FAR less improvement in their preparedness for sport).

Below are some videos of a couple of our female athletes performing pushups.  I'm sharing these for two reasons:

  1. To show that it is definitely possible for a girl to do a full-range pushup after proper training (without them being eternally destined to do "knee pushups" as the media will often portray).
  2. These pushups completely destroy 95% of the pushups I see performed by men across the country.  Boys: you really aren't that cool! Let's be real here and save the bench press for when we can perform at least 25 perfect pushups without any technical breakdown.

Below is one of our volleyball players (13-years old, mind you), Kenzie, performing five flawless pushups, and then topping them off with some sandbag walkovers:

Note: when Kenzie first came to us, she had to do pushups with her hands elevated on a high mat, so she has come a long way!

Next is Kaleigh (a track athlete), performing them with a 25lb plate on her back.

Thirdly, is a video of Kelsey performing some awesome TRX pushups, with her feet elevated.

And, last but not least, is Lisa banging out some single-leg, foot-elevated pushups. Strong!

Now, what to do if she can't yet perform a full-range pushup?  One option is to only perform the eccentric (the lowering or "yielding" portion of the movement) as Maggie is doing in the video below.  Focusing on the eccentric portion is actually a pretty key factor in rapid strength gains, especially in beginners.

Now, if someone can't do eccentric pushups them from the floor (as most people can't, initially), then you could simply have them elevate their hands on a mat or bench to make it easier.

You can even have them perform PUPPs, in order to acclimate to the feeling of supporting their bodyweight in full pushup position.

PUPP-575x323
PUPP-575x323

There are many other tools you can use as well, but I trust this is enough to at least give the women in the crowd some motivation, and get you thinking about tools outside the knee pushup to work on your strength and movement quality.

Cheers!

5 Core Exercises to Spice Up Your Training

This is a piece I had written last year that was lost with the transition from our old website to the new one. As our readership has grown, I thought this may be of interest to those of you who hadn't seen it yet. Ah yes, with the holidays approaching and everyone merrily chomping away at holiday parties, people will quickly begin thinking about "their abs" as the we round the New Year and begin to prep for Summer.  While one can definitely not out-train a crappy diet, these will be sure to spice up your core training.

Most people tend to pay attention whenever I say the word "Core," so I' thought this would be of interest to many reading this.  While this is by no means an exhaustive list, (there are many different exercises/variations I'll use depending on the specific scenario), I thought it would be useful to see some "unconventional" exercises that are actually extremely effective.

With the exception of a few of the combat athletes and military folk we train at SAPT, I rarely program sit-up variations for anyone training under our roof.  So, what do I normally utilize? Movements that challenge stability of the torso.

If your motive in doing core work is strictly driven by aesthetics, these will help you on your quest.  If you're an athlete seeking a stronger core for performance, these will, quite effectively, get the job done more so than the endless crunches and situps you're doing.  Not only are these great for those who "have to feel their abs working" to consider something a good ab exercise, but they have remarkable, (dare I say) functional implications as well.  Without further ado, here are 5 core exercises guaranteed to light those abdominals on fire.

(Note: The beauty of #1 and #2 is they can even be performed at home)

1.  Bodysaw Plank

For those of you who have already investigated training beyond the muscle mags, you know this one isn't anything new under the sun. However, for those of you who haven't tried this, be ready to have your pants blown off.

Once someone has mastered the standard plank, it's time to progress. Rather than simply add time to the equation (ex. making someone hold a plank for two minutes, which does nothing other than cause them to die of boredom), I prefer to make the exercise more challenging by one of two means:

  1. Loading the exercise (placing a weight on the back)
  2. Adding a dynamic component

The bodysaw progresses the plank by adding a dynamic element to the standard plank position.  This exercise utilizes the "anti-extension" function of our core.  In other words, it trains the trunk to resist hyperextension (excessive arching) of the low back.  There are 3 variations in the video below, ordered easiest --> most difficult (although some may argue my ordering of #2 and #3).  The first one, with the slideboard,  I originally saw taught by Mike Boyle.  The second - executed by dragging plates along the ground - I actually picked up from Chris, who figured it out when trying to find a way to have the Mason baseball guys do the exercise without use of a slideboard.  The third variation is completed by suspending your feet in a TRX (or any suspension system).  The TRX variation is quite difficult as you have to fight the "pendulum effect" of the straps wanting to swing you back to the starting point.

I also like it because it adds a nice intermediate stage between planks and rollouts.  Or, if you can already do rollouts, it's a way to train the anti-extension core function without quite as much delayed-onset muscle soreness.

**If doing the bodysaw plank at home, all you need is to do is simply place two hand towels on a tiled (probably kitchen) floor and go from there**

2.  "Move the Mountain" Plank

Similar to the Bodysaw Plank, this variation adds a dynamic element to the standard plank exercise.  You know have to stabilize your trunk as your arms move.  You can widen the base of support (your feet) to make the exercise easier.  The key here is to have minimal shifting of the torso and/or hips as you move the plates back and forth (I am even shifting my hips a bit too much as I demonstrate this one).

And be careful: this exercise becomes tiring deceptively fast.  Hope you enjoy!

**If you want to move mountains at home, you don't necessary need to use weight plates. You could use tennis balls, books, playing cards, your cat, you name it**

3.  Offset-Loaded Deadlift (or "shovel lift")

This is a fantastic exercise I picked up from a guy named Steven Morris.  You simply load one end of a barbell (I recommend a trap bar to begin with), then pick it up and stand perfectly straight.  Trust me: you won't need to put much weight on the end of the bar.  You can do this for reps (I'd keep it 6 and below) or hold it for time.  Then do the same thing facing the other way.  If you don't know where your obliques are prior to performing this exercise, I guarantee you'll figure it out as soon as you try this!  It is absolutely brutal, especially with the barbell.

Pointers: as you begin the lift, think about "pushing down" with the hand furthest from the loaded end (like your shoveling dirt) as you initially pull the barbell off the ground.  Also, the further you are from the loaded end, the more difficult the exercise will become.  This is very tough to get used to at first, but with some practice, you'll get it!  Just make sure you're not cheating by shifting your hips toward or away from the plate (have a partner watch to keep you in check).

4.  Feet-Suspended Sandbag Walkups

This one I actually made up, when I was coaching a guy who possessed a strong abdomen but needed to improve his shoulder health.  I love this exercise, as it's a great "bang for your buck" movement.  It trains, simultaneously, core stability and scapular function.  More specifically (with regards to shoulder health) it strengthens the serratus anterior, a muscle that is extremely important in aiding proper upward rotation of the scapula (shoulder blade), which has critical implications for overhead athletes (think baseball and tennis players, swimmers, certain track athletes, etc.).

Not to get too sidetracked, but it's easy to - when training overhead athletes - tend to focus exclusively on the rotator cuff when looking to improve shoulder health/function.  While this is definitely important, an often over-looked "piece of the puzzle" is the scapula.  If the scapula doesn't track properly when the arm moves into an overhead position, it compromises health of the shoulder joint.  Quoting physical therapist and strength coach, Bill Hartman: "Any altered scapular muscle function, weakness, or inability to position the scapula and then stabilize it results in a direct affect on the shoulder joint with dire consequences. These include glenohumeral instability leading to arthritis, impingement, rotator cuff tendonitis/tendinosis, rotator cuff tears, labrum injuries, and so on."

You will immediately find that you have to remain very tight during this, or your legs will very quickly begin to sway side to side in the straps.  Think "glutes tight, abs tight" as you walk up and down the sandbag (you could easily use an aerobics step, thick book, etc. in place of a sandbag).

Anyway,one has to possess quite a strong trunk in order to do this, so I wouldn't recommend throwing it to a rehab client unless you're sure they're physically ready to do it.

If you don't have access to suspension straps, no sweat. Simply perform these with your feet on the ground, or even elevate the feet (ex. onto a stable step or bench), which increases serratus involvement.

When considering training economy, this exercise is PHENOMENAL for killing two birds with one stone, especially when working with an athlete who needs special consideration with regards to his or her shoulder health.  For those simply looking to spice up their training with something different, this will fit the bill, too.

5.  Chaos Training: Supine Bracing with Partner Disruptions

I honestly don't know how to name this exercise in a concise fashion.  I do know that it originally came from Diesel Crew, so props to them for coming up with a devilish exercise.  This exercise isn't really practical for most because of equipment limitations (although there are creative ways to still get the same effect), and it's an illogical exercise for beginners, but I'd like to share it nonetheless.

Simply lock your feet in under a stable surface, lean back, and BRACE.  Hold one end of a rope, and have a partner hold the other end.  Be sure to have your arms extended, as this increases the lever arm that your core has to work through - essentially making the exercise more difficult.  As you can see in the video, Kelsey just pulls that rope in an unpredictable fashion: up, down, left right, away from me, etc.  If you never knew your core was designed for dynamic stabilization, you will know shortly into this exercise as it will feel like your abs are being torn in half. 

Suitcase Carry: An Exercise I like (and you should, too).

DCIM100SPORT
DCIM100SPORT
DCIM100SPORT
DCIM100SPORT

This past weekend I decided, spur-of-the-moment, to take a backpacking trip with a couple good friends of mine. It was incredible, to put it mildly. We loaded up our packs and took them for a 2-day journey along the Appalachian Trail in the Shenandoah. As evening approached, we found a great place near an overlook to pitch our tents. The picture at the top is a photo I snapped of our view of the sunset. As I was hiking along, I was quickly made aware that walking for two days - over uneven terrain with a 40lb pack on your back - makes for a pretty awesome workout. My traps, glutes, hamstrings, and cardiovascular system were all telling me that, just because I was away from the gym for a weekend, didn't mean I was going to get away with time off. To left is a picture snapped just before the start of the journey.

However, the point of this blog post isn't to tell you about my hike, the bears I slayed with my bare hands (they made the first move and attacked first, ok), or the damsels in distress I rescued along the trail. The point of this post is to give you a phenomenal exercise you can do in just about any gym. It isn't anything new, but my hike over the weekend reminded me just how much I love carry variations (due to the pack I carried throughout the trip), and how great they are for you.

The Exercise

Enter the Suitcase Carry. This will hammer your core (emphasis on the obliques and quadratus lumborum), along with your traps, deltoids, forearms, and ankles. Yes, the ankles.

It's tough to truly appreciate this exercise until you try it. See the video below of Ron performing the exercise:

How to Do It

You won't reap or feel the benefits of this exercise unless you walk with as perfect posture as you can. The key is to stand TALL. Your hips are going to naturally drift toward the weight, so do as best as you can to keep the hips from shifting. Shoulders "back and down," and stick your chest out as if your flaunting your stuff at the beach.

Why I Like It

One of the reasons I like this exercise so much is that most of you can do it in nearly any gym, and it kills multiple birds with one stone (see the benefits listed above the video). Just grab a heavy dumbbell, stand straight, and walk for 50-100 yards. Then switch sides. Even if you only have ten yards of space to work with, you can walk back and forth until you reach your target distance. You can use a heavy dumbbell or kettlebell for this. Yes, in the video, Ron has two kettlebells tied together with a towel because we're cool like that.

How much weight or how far should you go? As Dan John put it: You can either carry light weight for long distances, or heavy weight for short distances. I prefer heavy weight for long distances.

We've been doing this exercise for a few years but primarily using a "towel grip," during which you hold a towel looped through the kettlebell. While this is a perfectly good variation, I like tossing in the towel-free version as it takes a bit of stress off the grip (thus your grip will no longer be the limiting factor) and places more of the tension throughout the other areas of the body.

You know when you see people in the airport nearly toppling over to the side because their suitcase is so heavy? It's primarily because their core can't effectively buttress the weaker joints throughout the body. Don't be that guy.

Suspended Pushup (with a twist) for an Added Challenge + Improved Shoulder Stability

The primary function of the rotator cuff (which many people often miss) is to center the humeral head in the glenoid fossa. In order to accomplish this, the dynamic stabilizers of the shoulder need to be on their "A" game. This is of special consideration when dealing with athletes, as the nature of competition is frequently an "open loop" scenario. See the video below for a pushup variation that incorporates some dynamic stabilization of the shoulder girdle. We named it "Suspended Pushup ISO Hold (with perturbations) into Repetitions."


A couple notes:

  1. Having a studly powerlifter give you perturbations during the ISO hold is optional, as the suspension straps inherently provide a stability challenge on their own.
  2. This exercise hits multiple birds with one stone. It will give you a tremendous challenge for your core (you're essentially holding a plank position for the entire time), give you a nice stretch for the pecs in the bottom, improve the ability of your rotator cuff to stabilize the humeral head (where your upper arm bone attaches to the shoulder joint), and develop your upper body strength. Sounds like a winner to me.
  3. As shown in the video, hold at the bottom for 10-20 seconds, and then move into the desired number of repetitions. Stay TIGHT in the bottom. Everything should be braced. Everything....
  4. Using the suspension straps is actually a fairly advanced progression of a pushup (especially if your feet are elevated, as shown). Be sure you master the ground-based pushups first.
  5. (Piggybacking off of #2) If you don't have access to suspension straps (or a partner), no problem! Holding a tight isometric at the bottom of a pushup (on the floor), and then moving into repetitions, can make a great way of taking on a new challenge if standard pushups have become a bit easy for you.
  6. You increase testosterone levels by 50% if you wear a "Do Work" shirt while performing these.

Just don't tear your shoulder in two....Stevo

PUPP: The Most Simple (Yet Difficult) Exercise You're Not Doing

Want a surefire yet simple method of making your current workout more challenging, while simultaneously improving your core stability and shoulder endurance? Instead of walking around (or checking your cell phone) during your rest period, get into the top of a pushup position, and hold it right there while keeping your body stiff as a board. Do this for 30 seconds, and then return to your next exercise. Dan John calls this a “PUPP” (Push-Up Position Plank).

Give it a shot for a few rounds. You'll quickly begin to feel your abdominals, chest, and shoulders burning like crazy.

A few months ago I put together a video of enough anti-extension core exercises to last you a lifetime:

However, most people (and I'm no exception), could really just use PUPP for a loooongg time and continue to garner the benefits from it. After a while, you can elevate the feet, place your feet in suspension straps, or place a weight on your back. The progressions are nearly endless, and believe me when I say you don't need to progress too quickly.

Above is a picture of Kelsey and Carson both performing a PUPP. Kelsey is using the method I described above, and Carson is doing it as an actual exercise in his training program, holding it for 60 seconds (when you have your feet in TRX straps, you won’t want to do it more than a few times).

Note that this exercise is only as challenging as you make it. Sure, most people can hold themselves up for a minute. But few can do it correctly, and thus reap the full benefit of it. Your glutes should be squeezed so tight that a walnut would be cracked between them. Your stomach should be maximally braced to the point that if I were to suddenly punch you in the gut, you wouldn’t feel it. No sagging of the low back, and you should be able to draw a perfectly straight line from the top of your head through your heels (no reaching forward, or looking up, with the head).

Try it. That shaking throughout your torso occurring at the halfway point is your body telling you that you’re not too advanced for planks.

Other Applications Moving along a similar thread, I’ve found that the PUPP also makes an excellent exercise for those struggling to either:

a. Do their first perfect pushup b. Improve their max number of bodyweight pushups (ex. as in a military challenge)

A lot of people go up in smoke when they attempt the pushup because their core musculature fails in its role as a stabilizer, as opposed to the primary movers (ex. chest, shoulders, and and triceps) failing. By the way, by “core” I’m referring to the 30+ muscles that attach to your pelvis, not just your abs! All of these muscles must learn to work as a unit, and the pushup position hold aids you in your quest to achieve this.

So get to work, and enjoy some newfound stability and strength-endurance in your upper body and lumbopelvic regions.

-Stevo

SAPT's Top 5 Exercises for New Moms

Happy Birthday Arabella!

I’ve always heard a lot about how hard it is for a new mom to find time to exercise. But, I’m now living it and I’m here to tell you it’s a bunch of hooey. Regardless of time, here are my top 5 best exercises that ALL new moms are already doing in some form or fashion. So why not make them an actual workout?… you’re doing them anyway!

My Top 5 Exercises for New Moms

  1. Baby Goblet Squat (Ass to Grass) - I can’t even begin to guess the number of deep squats I’ve done over the last 12 months. This is a legit exercise that allows mom to work on ankle, hip, and thoracic mobility along with quad, hamstring, glute, CORE musculature, and upper back strengthening. Start with just a couple sets of 3-5 reps and work up 10, 15, or even more reps.
  2. Stairs – This one’s easy and obvious. That sweet little baby wants to be held all the time and mom wants to finish losing those last few LB’s, so why not take advantage of the situation and do a little low impact cardio on your household’s stair case?
  3. Baby Clean and Press – This one is fun for mom and baby and, as is common for all these exercises, occurs naturally. Hold the baby about mid-torso level and hoist her up overhead. This will work on a touch of posterior chain power development and get mom some much needed upper body strength and stability! Stick with just a handful of reps (3-6) for multiple sets.
  4. Baby Gate Hip Mobility – If the Ass to Grass Baby Goblet Squats aren’t getting it done for the hip mobility, then inevitably mom will have the benefit of crossing over a baby gate about 3 zillion times a day. I started enjoying improved hip mobility around 7 months when Arabella began crawling and suffered two cracked toenails to prove my hip mobility could, in fact, use improvement. You can’t do to many of these, just try to keep good form (chest up, lift you knee, no hip drop) and enjoy the benefits!
  5. Baby Carrier Household Chores – Talk about great for improving general physical preparedness (GPP)! Last summer Arabella and I spent many hours together with her strapped on my chest in the baby carrier while I did everything from dishes to laundry to vacuuming. You quickly learn if your core is strong or not. This one crushes the lower and upper back, in particular, but is excellent for rebuilding stabilization strength in mom’s midsection.

Here are a few more advanced exercises you can give a try if you’re feeling “froggy.” I should note that my baby is not old enough to reliably stay on my back for the plank or push-ups, maybe in a few more months!

  1. 1-Arm Baby Cradle Carry + Full Laundry Basket Carry – An advanced technique for the busy mom. Grab baby in one arm and full laundry basket in the opposite arm. This exercise is very similar to some of the Mis-loaded bracing/farmer’s walk variations we do at SAPT. Great for improving core strength and stability!
  2. Baby Plank – Use baby’s body weight to increase the difficulty of a standard prone plank.
  3. Baby Pushups – Again, using baby’s body weight to increase the difficulty of a push-up. Although we haven’t tried these yet, I’m pretty sure she’ll be having a pretty good time sitting on my back while “the ride” takes her up and down!

I’ll admit when I got the idea for this post it was designed to be “tongue in cheek,” but as I got to thinking about all the ways having a baby challenges new moms physically, I realized that these are some pretty darn good exercises. Not only are they fun, but they are also very productive if you just focus on doing a few things correctly and accumulating a bit of volume.

So to sum up, today is Arabella’s first birthday and I find myself exceptionally happy. I’m completely in love with my daughter and have found that my husband and I truly work well together. I’ve managed to lose all my “baby weight” and even a few more pounds to boot. And the icing on the cake? I’m working less and earning more.

If you know any new moms who might find this post motivational or inspirational, please forward it to them and don’t forget we offer comprehensive distance coaching to help moms all over the country lose those last few baby LB’s!