Tips on Training for a Hike
Irony of all ironies, I had planned on writing a post about hiking for today (I’ve been getting requests) and what did Steve do yesterday?!? A hiking post… unbelievable! Maybe this week will be SAPT's unofficial training for a hike week or something. So, I'm sticking with my post for today and felt is was appropriate to post a picture of one of the hikes I went on last week - this one is in Red Rock State Park. Tips on Training for a Hike
- Single Leg Strength Work is Essential! A large percentage of training should be dedicated to Step-up and Step-down variations. This is pretty much what a hike is after all. The step-up will help you get up to the peak, but what about when you’re on your return trip and your legs are fried? That’s when the step-downs will become crucial. Having exceptional eccentric strength in a fatigued state will not only allow you to return safely, but more quickly, too! I’m afraid I may sound like I’m hopping on Mike Boyle’s anti-bilateral movement crusade with this, but I think ditching the squats and deads may be a great move for a focused time leading up to an important hike.
- Bracing Variations. As Steve pointed out in his post yesterday, hikers will usually be loaded up with all kinds of gear (think added weight) and they need to be able to easily brace and stabilize to carry the loads without undue fatigue. How can you train this in the gym? Give BB Squat Hold Variations, Mis-Loaded BB Hold Variations, Plank Hold Variations, and Band Swing Hold Variations a try. Notice the theme word for these exercises is “hold” a.k.a. isometric – a hiker needs to have an extremely strong “core” (gasp, I can’t believe I just used that word) to ensure the muscle groups that should be doing the bracing do their jobs.
- Mobility Work. This will be critical for the entire body. Especially considering that hikers often stay in a fairly upright position, so when they need to call on some extreme hip mobility to traverse certain terrain you want that mobility to be present. Otherwise, injuries will pop up.
- Lastly, if I seriously wanted to show my hiking prowess off, I would implement Steve’s HICT training. Add this in twice a week plus a long hike on the weekend.
***I'm going to get some videos up this evening, so please check back if you want to see some of the variations I mentioned!
Don't forget, if you're out of the DC/NoVA area, we can still get you prepared to destroy your next competition, event, or just life. Find out more by requesting information on our distance coaching program!
Suitcase Carry: An Exercise I like (and you should, too).

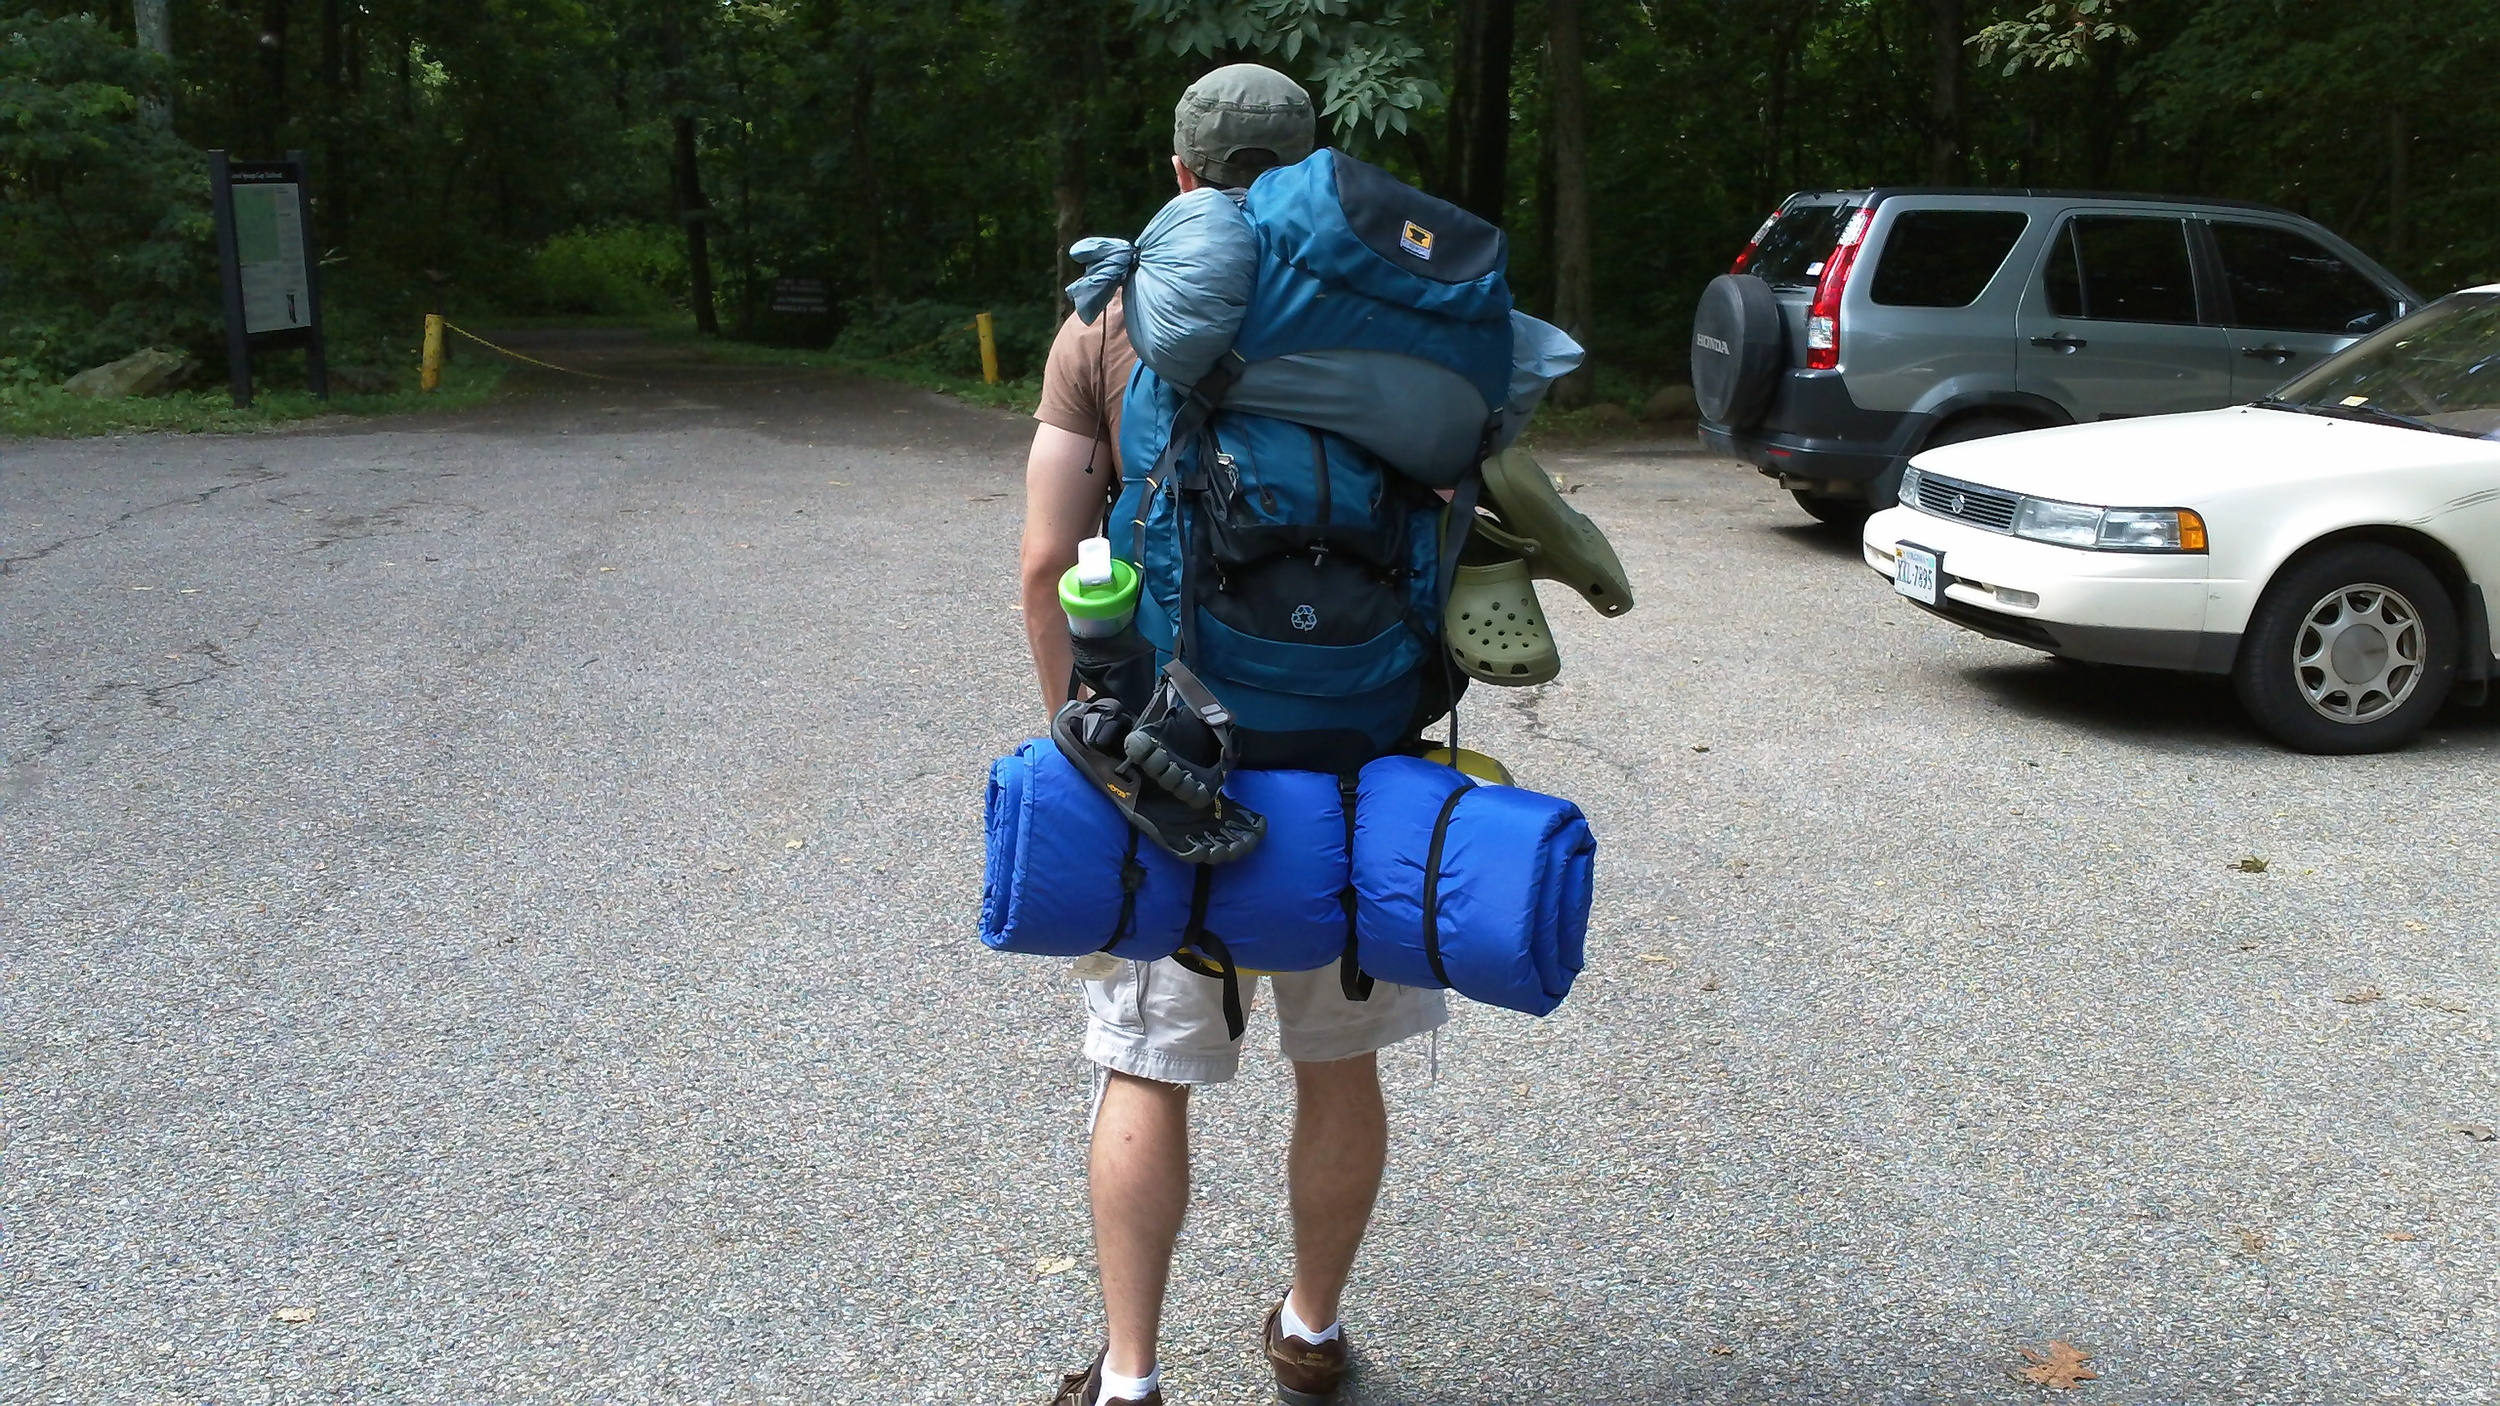
This past weekend I decided, spur-of-the-moment, to take a backpacking trip with a couple good friends of mine. It was incredible, to put it mildly. We loaded up our packs and took them for a 2-day journey along the Appalachian Trail in the Shenandoah. As evening approached, we found a great place near an overlook to pitch our tents. The picture at the top is a photo I snapped of our view of the sunset. As I was hiking along, I was quickly made aware that walking for two days - over uneven terrain with a 40lb pack on your back - makes for a pretty awesome workout. My traps, glutes, hamstrings, and cardiovascular system were all telling me that, just because I was away from the gym for a weekend, didn't mean I was going to get away with time off. To left is a picture snapped just before the start of the journey.
However, the point of this blog post isn't to tell you about my hike, the bears I slayed with my bare hands (they made the first move and attacked first, ok), or the damsels in distress I rescued along the trail. The point of this post is to give you a phenomenal exercise you can do in just about any gym. It isn't anything new, but my hike over the weekend reminded me just how much I love carry variations (due to the pack I carried throughout the trip), and how great they are for you.
The Exercise
Enter the Suitcase Carry. This will hammer your core (emphasis on the obliques and quadratus lumborum), along with your traps, deltoids, forearms, and ankles. Yes, the ankles.
It's tough to truly appreciate this exercise until you try it. See the video below of Ron performing the exercise:
How to Do It
You won't reap or feel the benefits of this exercise unless you walk with as perfect posture as you can. The key is to stand TALL. Your hips are going to naturally drift toward the weight, so do as best as you can to keep the hips from shifting. Shoulders "back and down," and stick your chest out as if your flaunting your stuff at the beach.
Why I Like It
One of the reasons I like this exercise so much is that most of you can do it in nearly any gym, and it kills multiple birds with one stone (see the benefits listed above the video). Just grab a heavy dumbbell, stand straight, and walk for 50-100 yards. Then switch sides. Even if you only have ten yards of space to work with, you can walk back and forth until you reach your target distance. You can use a heavy dumbbell or kettlebell for this. Yes, in the video, Ron has two kettlebells tied together with a towel because we're cool like that.
How much weight or how far should you go? As Dan John put it: You can either carry light weight for long distances, or heavy weight for short distances. I prefer heavy weight for long distances.
We've been doing this exercise for a few years but primarily using a "towel grip," during which you hold a towel looped through the kettlebell. While this is a perfectly good variation, I like tossing in the towel-free version as it takes a bit of stress off the grip (thus your grip will no longer be the limiting factor) and places more of the tension throughout the other areas of the body.
You know when you see people in the airport nearly toppling over to the side because their suitcase is so heavy? It's primarily because their core can't effectively buttress the weaker joints throughout the body. Don't be that guy.
HICT: A "Secret" and Powerful Method of Aerobic Training
Watch the video below to discover a very powerful, yet unconventional, method of developing the aerobic system: (Note: If video is not your thing, I wrote down the bullet points from the video down below.)
This method is referred to as High Intensity Continuous Training, or HICT.
- Great for military folks, wrestlers, fighters, endurance athletes, or anyone that needs to be able to produce a reasonable power output for an extended period of time.
- Start with one, 10-minute set, and gradually work you're way up to two, 20-minute sets (be warned, twenty minutes is a loonggg set).
- It is both high intensity and high volume, which is what makes it so different than other forms of aerobic training.
- The intensity is based on resistance, rather than speed, which is why it allows for such a high volume of stimulus. Most high intensity aerobic intervals are based on speed, ex. a 15-60 second sprint, so you can only maintain that level of effort for so long before you fatigue and have to slow down.
- Your heart rate should stay in the 150s or low 160s during these, which is under most people's anaerobic threshold (for example, mine is about 174bpm).
- Because the heart rate remains under the anaerobic threshold, there is adequate oxygen supply (and thus it's possible to enhance the aerobic abilities of your fast twitch fibers).
- If you're doing step-ups, as I am in the video, the preferred method of loading would be a weight vest. I'm using a backpack in the video because, at the time, I didn't have access to a vest. Don't use a barbell (trust me, I tried it).
- If the weighted step-ups isn't a viable option, you could use a high quality spin bike. Just crank of the resistance on that thing so you're at 20-30rpm (this is very slow). You should literally be coming off the seat a bit on each push of the pedal.
It was 10:15pm - past my preferred bed time - when I filmed this, so forgive me for my tired expression and somewhat scattered thought process in the video.
HICT is an extremely powerful tool when used appropriately.
In-Season Training Programs for Fall Sport Student-Athletes: Retain and Rejuvenate
Scientific research and my own personal experiences have proven to me how critical in-season training is to ensure optimal performance, and ultimately realization of off-season training goals. SAPT in-season training programs aim to deliver the following: -While it’s not uncommon for novice and some intermediate trainees to garner strength and power improvements even while in-season, the focus for most should be on strength and power retention. Studies have shown that within just 2-weeks of training stoppage, one will begin experiencing declining strength levels and power output. Considering that the majority of a season’s most important competitions occur well after the 2-week mark, and you can imagine the competitive advantage one will possess if he or she remains consistent with training through the duration of a season.
Closely managed in-season programming will allow one to peak when the stakes are at their highest. Don’t let the 2”+ vertical jump improvement you worked so hard to attain during the spring and summer months dwindle before your most important competitions!
-Maintain the overall physiological health and well being of the organism. Often overlooked is the asymmetrical nature of sport. The countless, often times one-sided, repetitions one takes during a competitive season can snowball into overuse injuries. In-season training programs should include the mobility drills, corrective exercise, stretching, and soft tissue work necessary to limit restrictions and imbalances caused by sport.
-Rejuvenate the mind and body. An appropriately structured in-season maintenance plan considers both the physiological and psychological demands of a competitive season. Balancing school work, practice, travel, and competitions is friggin’ a grind. A focused, concise training session that incorporates some soft tissue work, total body movements, and some good conversation, will go a long way in ensuring both the mental and structural stability of a student-athlete.
To learn more information about our in-season maintenance training programs, CLICK HERE!!!
Chris
Time For Some Basic Body Maintenance
When you were a baby, you were able to stick your foot in your mouth. Think about that. Sticking your foot in your mouth. Try to do that now, and every 49 out of 50 of you will most likely find this to be laughable.
Why does this even matter? Well, an extremely simplified way of putting it is that if you're unable to draw ROM (range of motion) from a joint that is supposed to be able to provide it, then you're going to compensate at a joint that is not supposed to move. A quick example of this is that many people with low back pain tend to have stiff hips (their back is moving to pick up the slack, due to lack of mobility at the hips).
- If you’re a weightlifter, better mobility will improve your positioning during the set-up, thus giving you a greater mechanical advantage. This will allow you to move even heavier weight, and, more importantly, do it safely.
- If you’re an athlete, greater mobility is going to help you produce more force (a quick example being that improved dorsiflexion ROM at the ankle will prevent you from prematurely drifting on to the ball of the foot, thus allowing more force to come from the powerful posterior chain).
- Heck, even if all you care about is tending your garden well into your years, you’re be at reduced risk of back pain due to the fact you can sit into a deep squat without significant rounding of your lumbar spine.

I recently came across an old picture of myself getting ready to face-off, back in my competitive lacrosse days, that brought home the very point I addressed above (I'm in the red/black on the left): As you can see, I'm as low to the ground as possible. When getting into position for a face-off in lacrosse, it's generally accepted that one of the keys to gaining an immediate advantage over your opponent is to be lower than they are.
When looking at this picture, I was promptly struck by the fact that it was much easier for me to get into this position back in high school than it would be for me today. I didn't know it at the time, but I was asking my body to provide quite a bit of ROM at my ankle and hip joints, and also throughout my entire thoracic spine. This, in turn, would put me in better position to utterly destroy him win the face-off.
Anyway, this picture gave me a pretty large "pillow womp" to the face. I realized that, while I do perform about 10 minutes of mobility drills before my lifting sessions, it's not even close to the quantity I need to undue the hours of sitting (in my car, in coffee shops, at my desk, etc.) each week. Gradually, over time, I have lost mobility and created more positional problems for myself. I decided to make a greater effort in prioritizing my movement quality via some quality drills (which I show below).
Given that most of you spend 40+ hours per week (and this is probably giving you more than deserved credit), you'd be wise to listen up. This past Sunday I spent a good deal of time fixing up all the sticky junk restricting my motion. I took some pictures of some of the drills I've found to be the "best" in hopes that you can benefit, too.
Spend two minutes per side for most of these drills. Remember, doing some quick bodyweight squats before your lifting session isn't enough to undue the abuse you give your body from sitting (aka "the slow death position") 160 hours a month.
Before I begin, I can thank Kelly Starrett of the Mobility Project for a few of these drills. He's doing a great thing over there (to put it mildly) by encouraging people to daily work on their grody joint mobility.
For the first three, you can use any table or bench. The last picture shows a variation I'll use in coffee shops (not kidding), as it keeps my foot off the table. Think "chest tall" for all of these. You'll cover hip flexion+external rotation, throracic spine extension, and get in a bit of adductor work, too (in the first photo).


Next, we'll receive a bit of improved dorsiflexion ROM (in the top left photo), as well as some much-needed work on the iliopsoas and rectus femoris (a few of the hip flexors) in the right and bottom photos. You can use any wall or elevated surface for ankle drill, and can use a couch, chair, etc. for the right one. You'll need a sturdy resistance band for the bottom mob shown.


And, lastly, enjoy some extension of the thoracic spine (and perhaps a bit of stretching in the lats), by propping your elbows up on a bench:

For all of these drills, think "contract....then relax." Hold the stretch for about ten seconds, relax, and then repeat for two minutes or so.
You'll feel like a million bucks when you're done, not kidding.
My Vacation Post
I’ll warn you right now that this post doesn’t have an underlying message – sorry about that, but I’m on vacation and just feel proud I remembered to get my post up on time today! In fact, at this moment I’m sitting at the dining room table in our apartment overlooking the golf course at our resort in Phoenix and looking forward to a run and lift after I finish this post. Here are my scattered thoughts related to both training and vacation: I’ll admit Phoenix is hot this time of year, but humidity is the great equalizer. I swear 110 degrees in Phoenix at 30% humidity feels better than 96 degrees and 78% humidity in DC. Check out the photo, I had to document the car reading (the highest we’ve seen it is 124).
I caught the Wimbledon men’s final on Sunday and was struck by the single leg strength and hip mobility Djokovic displayed as he cruised to his first Wimbledon title. It’s really staggering if you think about it. The picture is, clearly, not from Wimbledon, but you get my point.
Yesterday, Ryan and I spent the day driving on the Apache Trail, which wraps around the Superstition Mountains east of Phoenix. The most noteworthy part was the 22-miles of off-roading (the Arizona Dept. of Transportation called it “unpaved”) we did in our rented Taurus. It was a lot of fun but that portion alone took us like 90-minutes to get through at 10-20mph. However, the big payoff are two lakes that can only be accessed via this unpaved portion and they are amazing! Well worth any damage the car we don’t own may have sustained.

As you can imagine the resort’s “fitness center” leaves a lot to be desired. BUT, it does have enough that I’ve already accomplished a couple of great circuits. Afterall, vacations lend themselves to a trifecta of eating, drinking, and sitting – I’m willing to do two of the three and this vacation I’ve chosen eating and drinking. For the rest of the week, I have no intention of letting my training drop off and will simply modify what I have already written for myself. Today will be:
A1 Broad Jump
4x3
A2 Spiderman Stretch
x3
DB Front Squat
5x5
B1 Lateral Stepdown
4x5
B2 3-Point Row
4x5
C1 45 deg Back Ext
3x8
C2 Something for Grip
3x:20


